Mod Podge – Letters
So recently I rediscovered Mod Podge and oh my goodness, it is so fun! I honestly want to mod podge everything!! There is so much you can do! And there is so many cute ideas on pinterest!
Anywho… a few months ago I bought “S & T” at either Hobby Lobby or Joann’s (I honestly can’t remember which, they both have letters though) and the plan was to decorate them! The letters are about two inches thick and made out of some kind of cardboard material. First I tried Washi Tape. Fail. It really was a disaster hah. Washi tape wasn’t made for that material of cardboardy letters. And then I was going to try wrapping yarn around them, because I’ve seen it before and it was so cute! Guess what? Another fail! That one was even MORE of a disaster! And I even started with the easiest letter! So there they sat… for awhile, away from sight, until I could actually decide what I was going to do with them…
Then about a week ago this girl I know reminded me of Mod Podge! And so it was decided, I was going to mod podge some super cute scrapbook paper on my letters. Boom. Target had this packet of scrapbook paper that was fairly inexpensive and I also bought a container of matte mod podge.(I didn’t want to try making some from scratch just yet, but I pinned some recipes I’m going to try)
For this project, you will need…
- Mod Podge (store bought or homemade)
- Sponge brush (or any type of brush you have around)
- Letter’s to decorate!
- Scrapbook paper
- Scissors or an exacto knife might work decently
- Paint (Color of your choice)
I started off painting the outside of all the letters black. I also painted a little on the face of the letters incase I didn’t do the best at cutting out the paper. 🙂
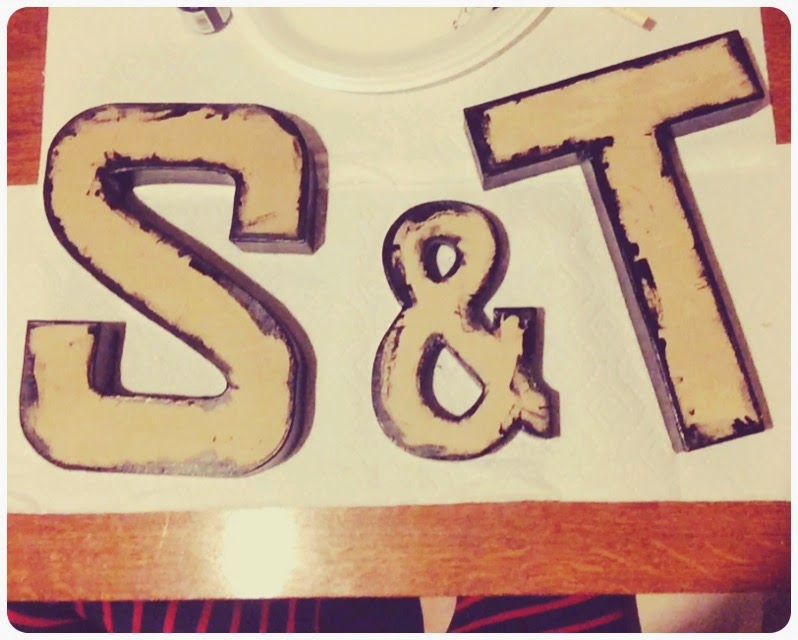
Note: Any type of paint should work just fine. You will end up coating the entire thing in the mod podge, which will seal it.
Peace of cake, though my paint had to dry for 24 hours… The paper letter’s is where I had some slight issues. I kept trying to trace everything on the scrapbook paper upside down…which is a terrible idea. Erasing is also a pain so make sure you trace the letters correctly! And then cut them out. Make sure they are cut enough to fit nicely on top of the letters. I cut mine a little shorter so the paper didn’t hang off the edge anywhere.
Now we get out the mod podge! Doing one letter at a time, sponge brush one layer of MP on the top of the letter and let it set for 30 seconds. Then, apply one more layer of mod podge on top. Stick on the letter and make sure there are no bubbles! Sometimes using a card helps to smooth everything out. Set that letter aside and repeat with all other letters. Let them dry at least 10-15 minutes. (You may want to avoid putting the mod podge on the back of the scrapbook paper to stick it down…it tends to start curling… it’s especially annoying on the S)
Next you are going to cover the entire letter (except the back because I don’t think there is a point for that). And don’t worry, it dries clear!
My paint dried glossy and the mod podge was matte, so it would look funny if I didn’t completely coat all the sides. And, like I said before, it seals it up all nicely. I would suggest doing one coat, let it dry completely and then maybe apply one more coat. If you don’t like the little brush marks, you could get really fine sandpaper, but no one should be inspecting your work that closely. If they do, just poke them in the eye.


You May Also Like
Avocado Dye: Take One
June 19, 2019
Crayon Art
February 19, 2014