A robe has been on my list of things to make before baby girl comes and the Sybil Robe has been my number one choice! There are a lot of other really great robe options as well (some that are free!) and I will list a few of them in a bit.
Baby girl is due in less than 5 weeks! Crazy right?! And I’ve had the fabric for my robe for weeks! I’m not sure why it took me until now to sew it. It didn’t even take all that long! Maybe the thought of a robe sounded daunting because I’ve never made one before…? I’ve also had the pattern printed for awhile and finally cut it out the other day.
So, I picked this pattern opposed to the others because the sleeves are more narrow and it has an inside tie, which keeps the wrap more in place. Definitely something I want since I plan on wearing this in the hospital after delivery. Most of the other robes are more kimono style, which is great, but I don’t love that. But if you are looking to make a robe, here are a few options!
Those are the most common ones i’ve seen people make or recommend. There may be a few other options but those appear to be the most common. Especially the RAD one because it’s free.
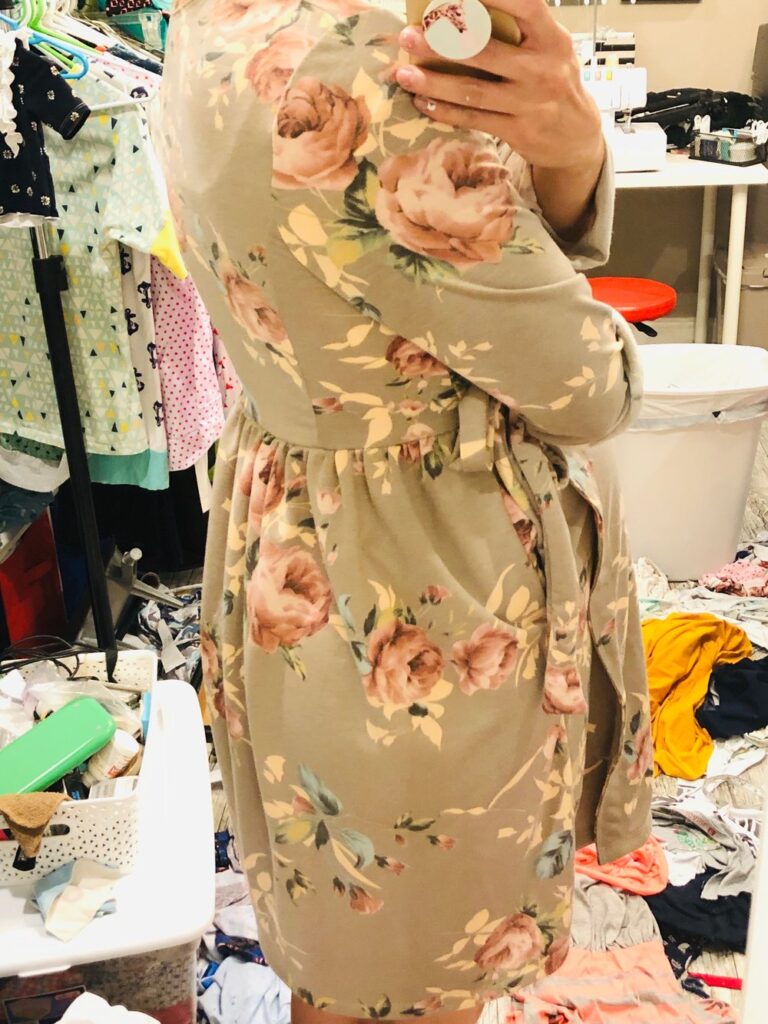
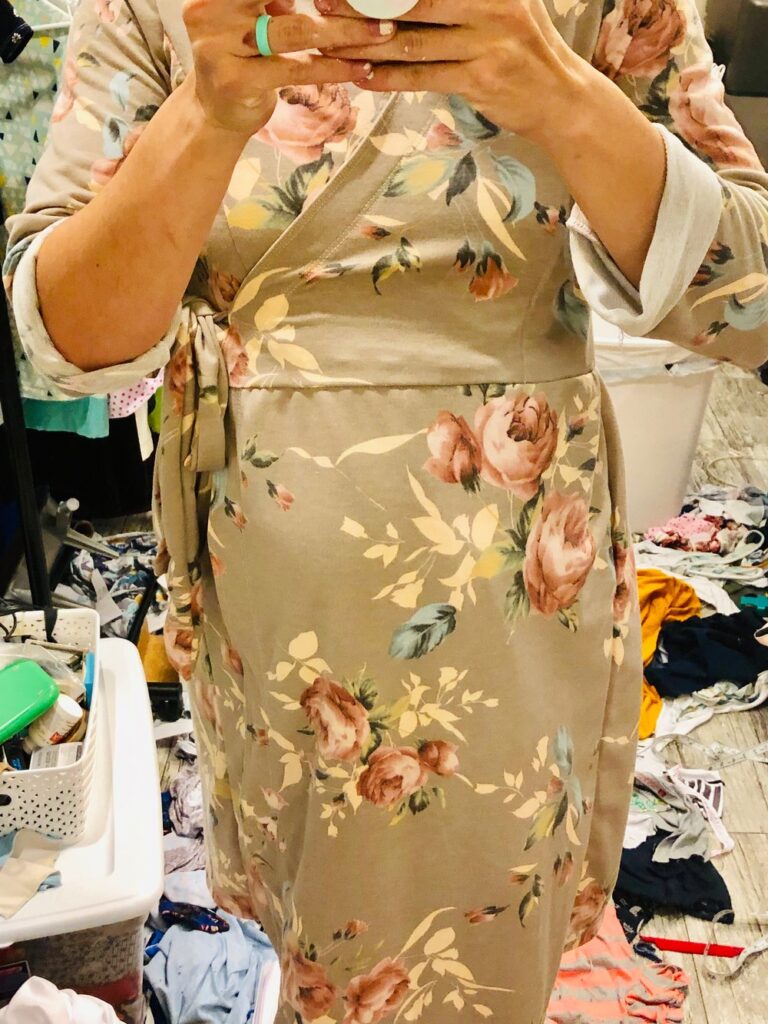
The Sybil Robe was really pretty simple! I used this French Terry from So Sew English. Love how it turned out! I did do a few things different and I have a few complaints but easy fixes for when I made this the next time around. I also sewed my pre-pregnancy size (which is only a size smaller than my pregnancy measurements, except for my belly).
First things first, I made option B. If you want your robe to have gathers going all the way around, you are going to need to at at least 5” or more to the front skirt! (The back is fine) When I was sewing the skirt to the bodice, I basically took out all of my front skirt gathers to make it fit. Kind of annoying because I like the gathered look and it would make the robe fit a bit better with this prego belly of mine! I would have added more width if I would have known! If you are going to make option A, maybe use the option B skirt piece for the front just in case? (see photos towards the bottom!)
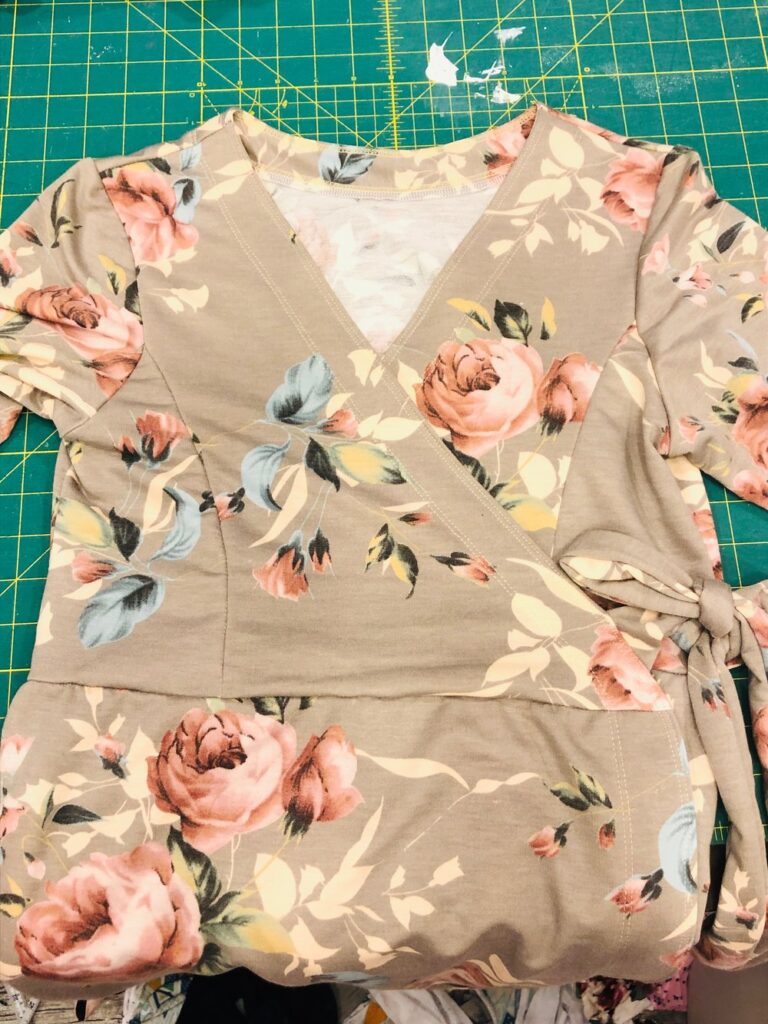
Ties! The instructions call for ribbon, which I hate. I don’t think it stays tied very well, but it also only says “wide” and “narrow” ribbon. It gives you the option for fabric ties, but only includes length, no width.
For my narrow fabric ties, I cut 2 pieces of fabric 1”x10”. Matched the long edges together and sewed together with a 1/4” seam allowance. Turned it right-side out and stitched down one end of each. (This size was perfect and was comparable to an RTW robe I have.)
For the wide fabric ties, I cut 4 strips of fabric 2’“x24”, sewed together the long ends and 1 short end with a 1/4” seam allowance and flipped it right side out. (For the wide ties, i made it with the greatest stretch going parallel to the 2” width since I didn’t really want them to stretch out too much when tying.) 24” actually ended up pretty long, so you can get by with 20-24”.
When attaching the ties, the instructions seemed a bit confusing for the ones sewn into the side seam. I basted one wide tie to the outside on the left (when looking at the back bodice) and sewed a narrow tie to the inside on the right, about an inch above the bottom of the bodice.
Oh, BTW, the pockets are small, so I’d suggest cutting them a little bigger or just use a different pocket piece from another pattern you have.
When attaching the second ties to the front of the robe, I probably could have sewn those closer to the skirt seam. Oh well. Something for the next time!
I also did not use any interfacing on the facing pieces. (But that was fine since my fabric doesn’t have much vertical stretch and I cut my pieces with the least amount of stretch.) Once I sewed the facing on, I used my coverstitch and topstitched right next to the edge. This helps keep the seam flat and gives some strength to the tie seams. I then did another set of topstitching at the end of the facing to keep it in place. LOVE how that turned out!
I shortened the bodice a tad since I’m shorter than what the pattern drafts for. And that’s pretty much it!


2 Comments
Mo
This is really lovely! Totally sold me on the pattern.
Trissa Bouwhuis
It’s a good one! I kind of already want to make another, even though I don’t wear robes often hah! <3