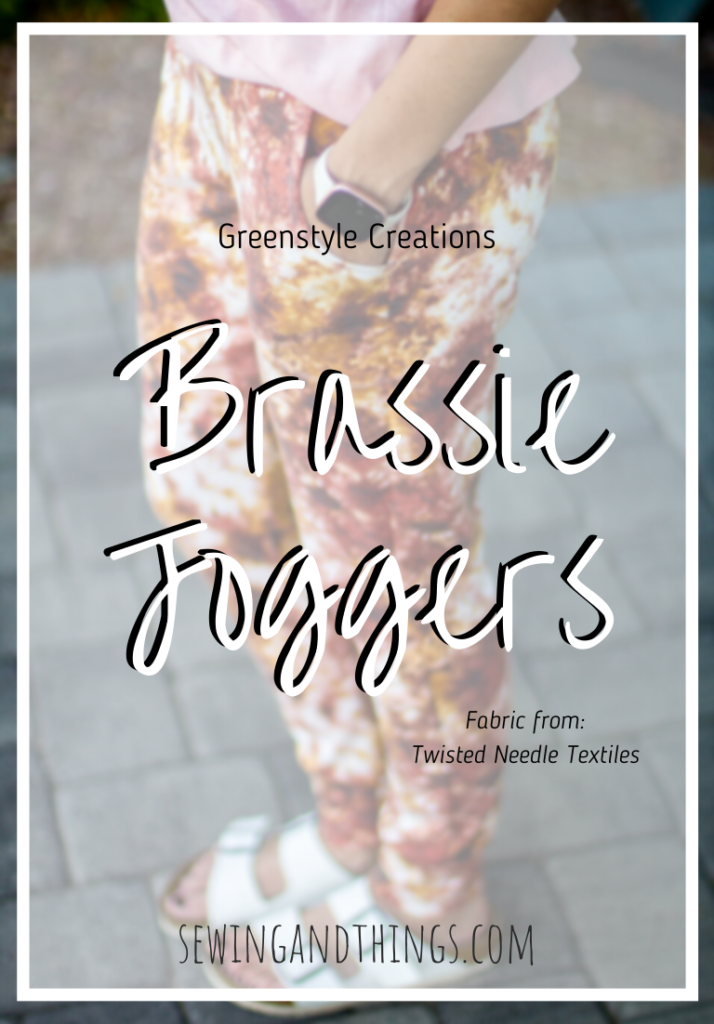
GreenStyle Creations – Brassie Joggers
I can’t believe I’ve been meaning to talk about Greenstyle Creations’ Brassie Joggers for almost 2 years now! (I’m such a slacker!) Within the last two years, the Brassie’s have been updated and they are better than ever! So, I’ll skip anything about my first pair of Brassies, since it was before the update and not really applicable now. If you got the Brassies before they were updated and haven’t sewn the new version up yet, you definitely need to! The fit was updated and new sizes added.
Now, I don’t think the Brassies are my favorite jogger pattern, but they are definitely a top contender. But I also like different jogger patterns for different reasons, so it’s a little difficult to pick a favorite. But more on that later…
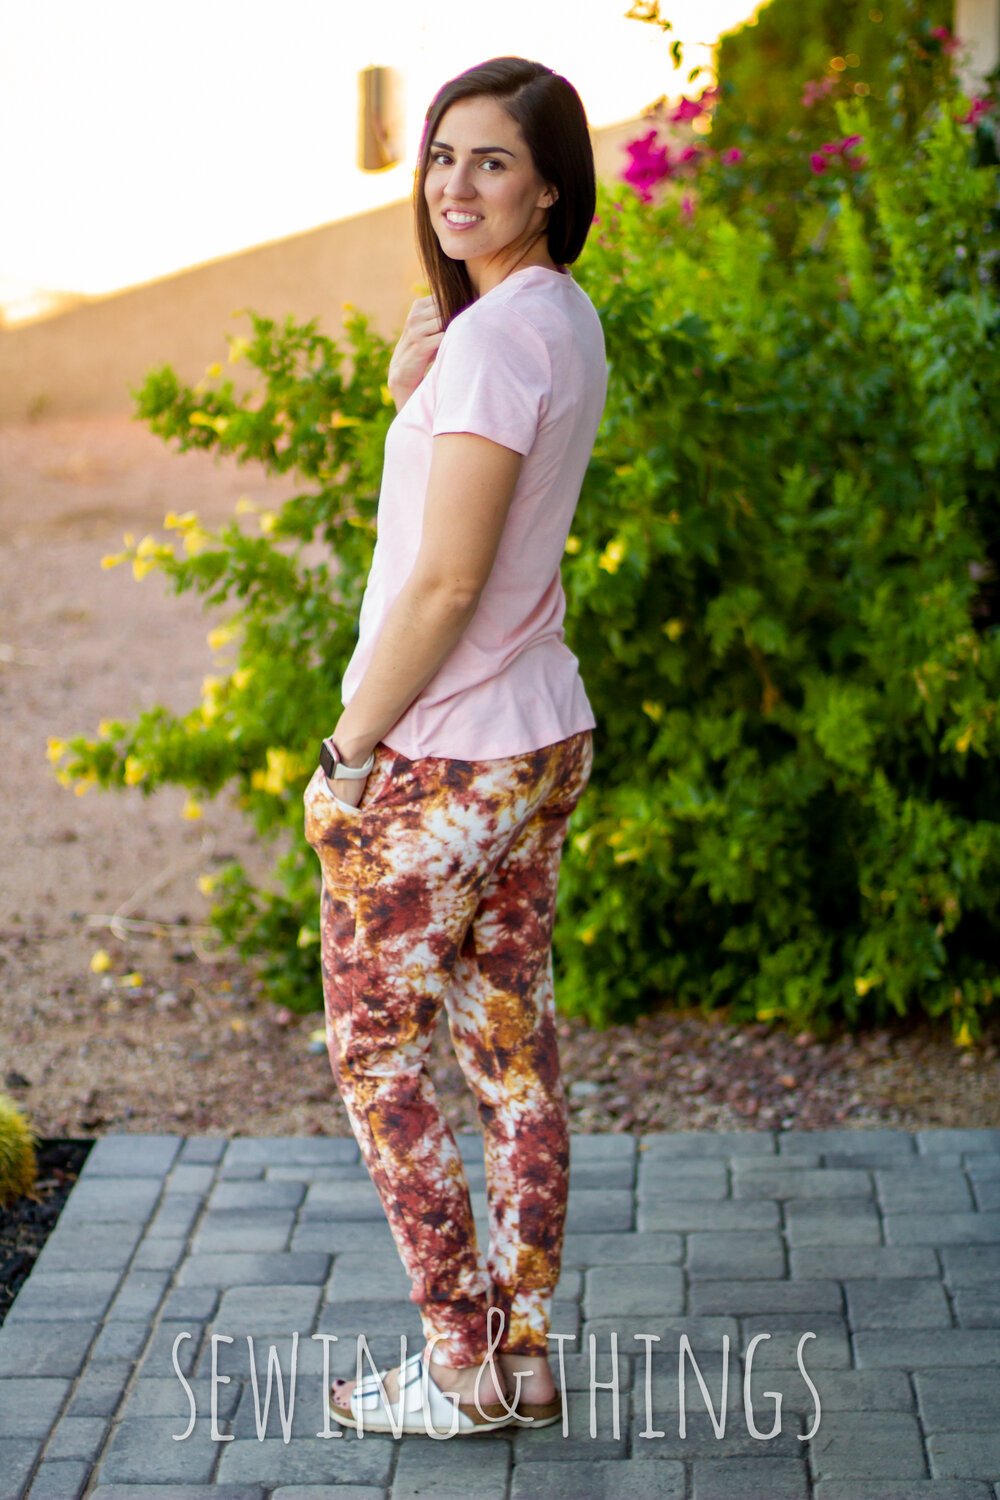
The Brassies have multiple rise options, which is SO great! The mid-rise version is my go-to and what I always sew up. There is also a different pattern/download file for each of the different rise options. The updated version has 2 pocket options now; the regular slant pocket and a zippered pocket (I’ll probably never sew up the zippered pocket version though). It’s also drafted for a height of 5’7”. Keep in mind that this is more of a guide since some people will carry their height in their torso or in their legs, so even if you are 5’7, you may still need to make some adjustments.
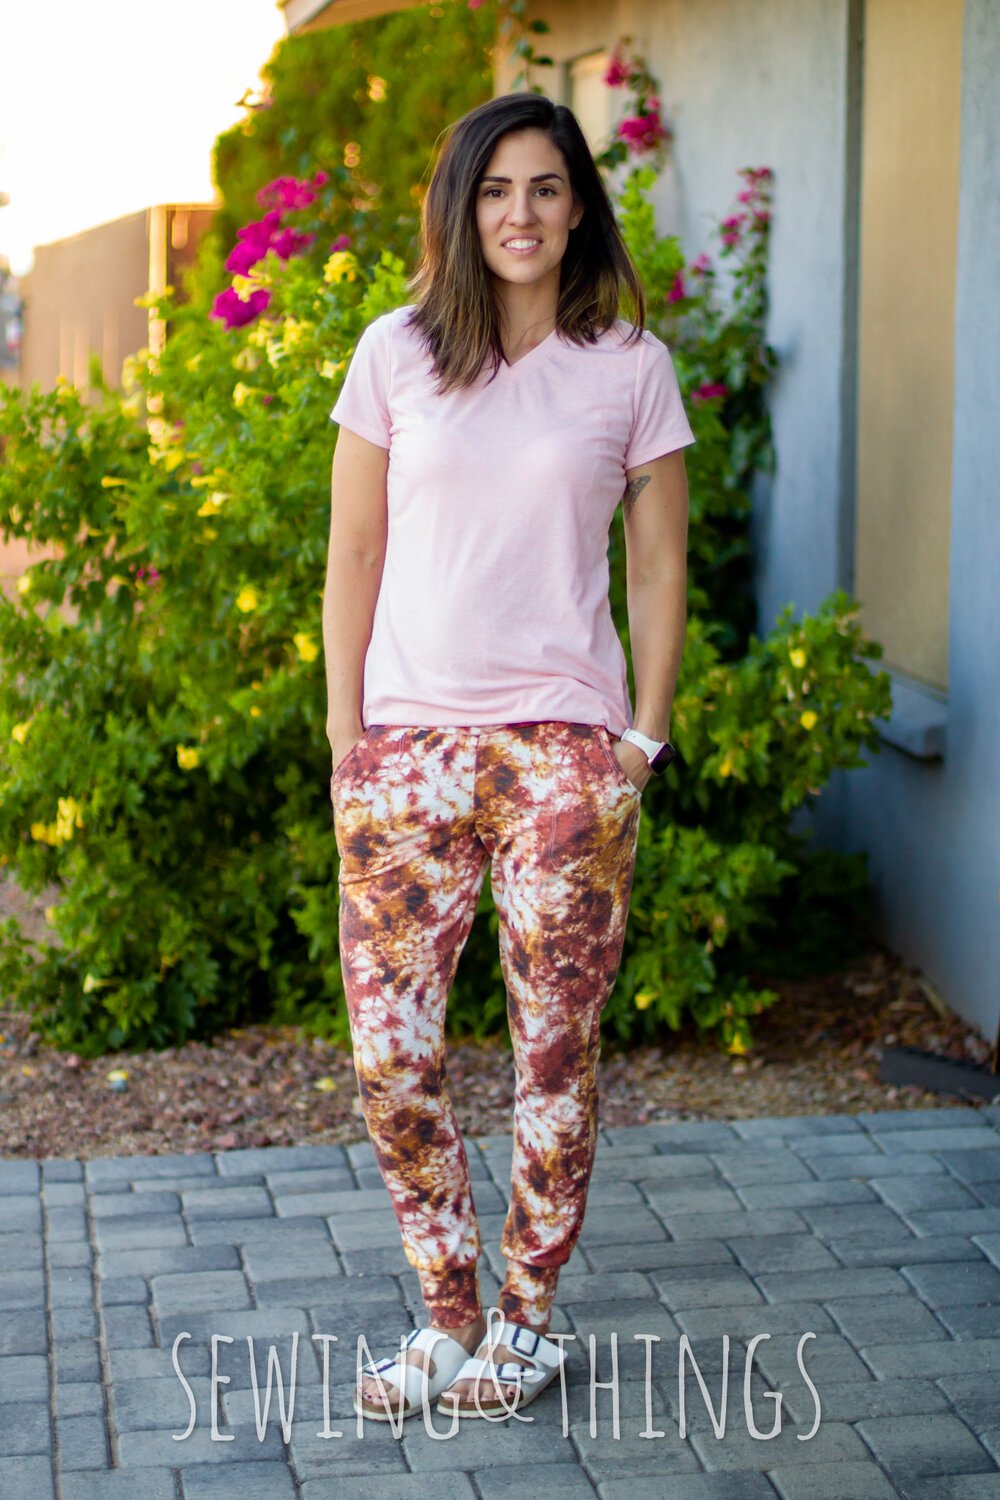
For reference, my hips are 36” and my natural waist is 28” and I sew up a straight XS (other than the slight length adjustments).
Fabric
I’ve sewn Brassies in a few different fabric bases and I’ve decided that I prefer fabric with a little bit more drape. Poly/Rayon/Spandex French Terry is a great base for these. Custom Cotton Lycra…not so much (too stable for my preference) but regular CL would probably be fine. The pair I made below is from Twisted Needle Textiles – Off The Rack Collection and it just got added to the shop!
Adjustments
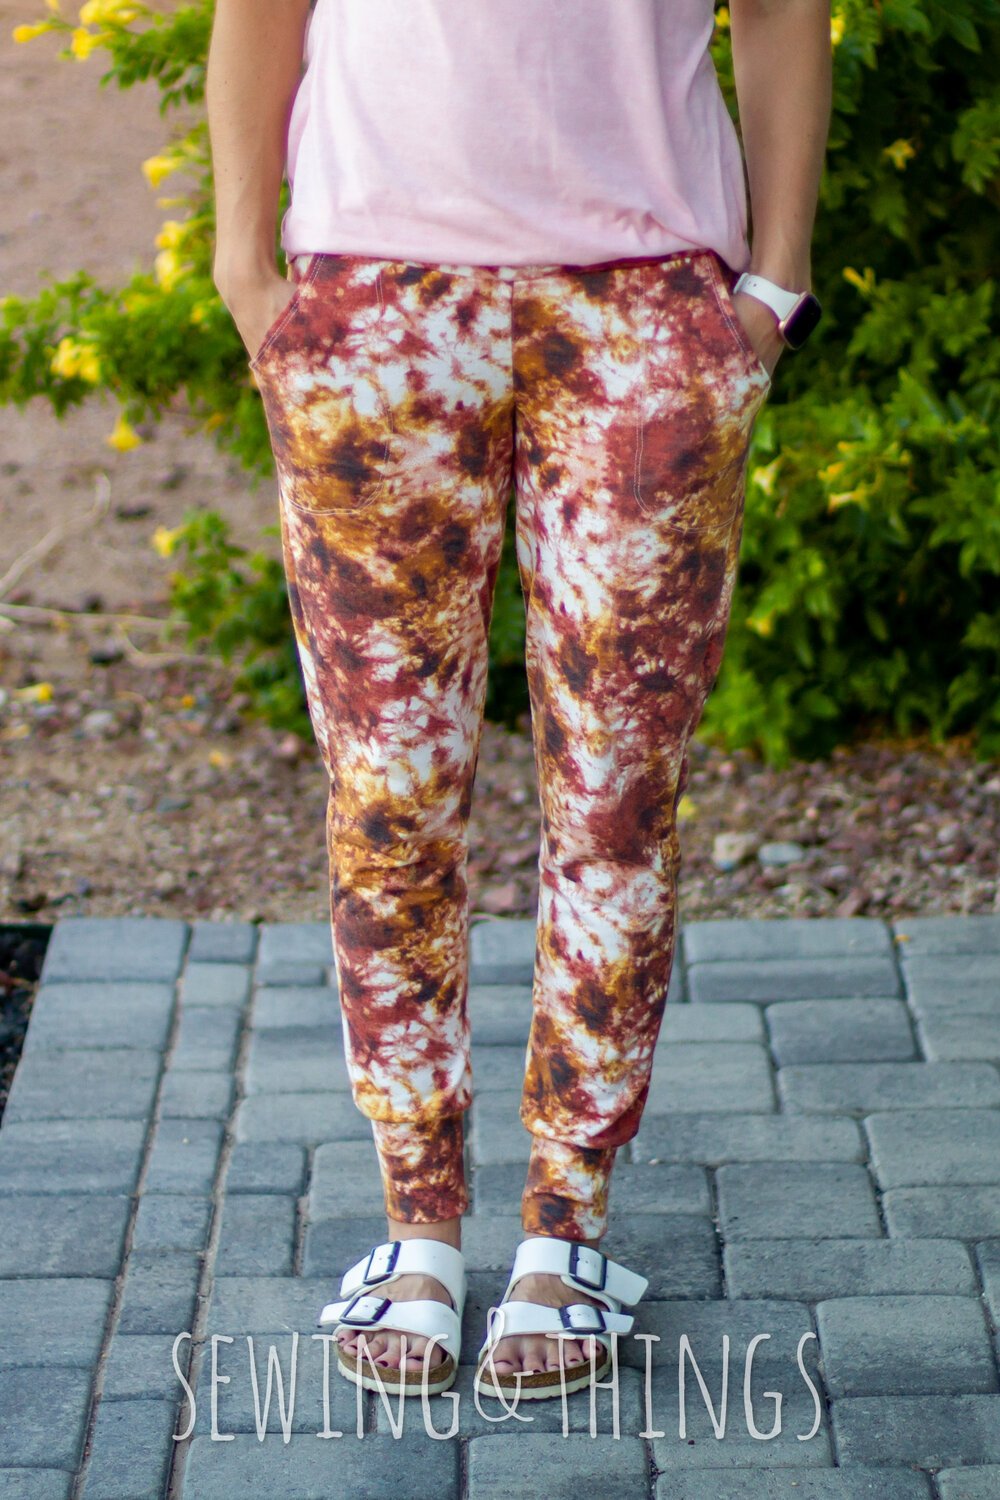
I only really do 2 adjustments to the pattern. One is for height and the other is for personal preference. I’m an average 5’4”, meaning I don’t feel like I carry my height (or lack thereof) more so in either my torso or legs. But with that, the pattern as is would be too long, or id have quite a bit of excess fabric pooling at my ankles. So, I take off 2.5 inches. When you add or remove length, usually it’s done above and/or below the knee and sometimes also at the knee (depending on how much you are adding/removing). Usually it’s distributed evenly. I, however, take all the length out of the thigh. Taking it all out there makes the “long shorts cutline” at the perfect spot for me, which means I don’t have to make any additional adjustments if I want to make some Brassie shorts (winning!).
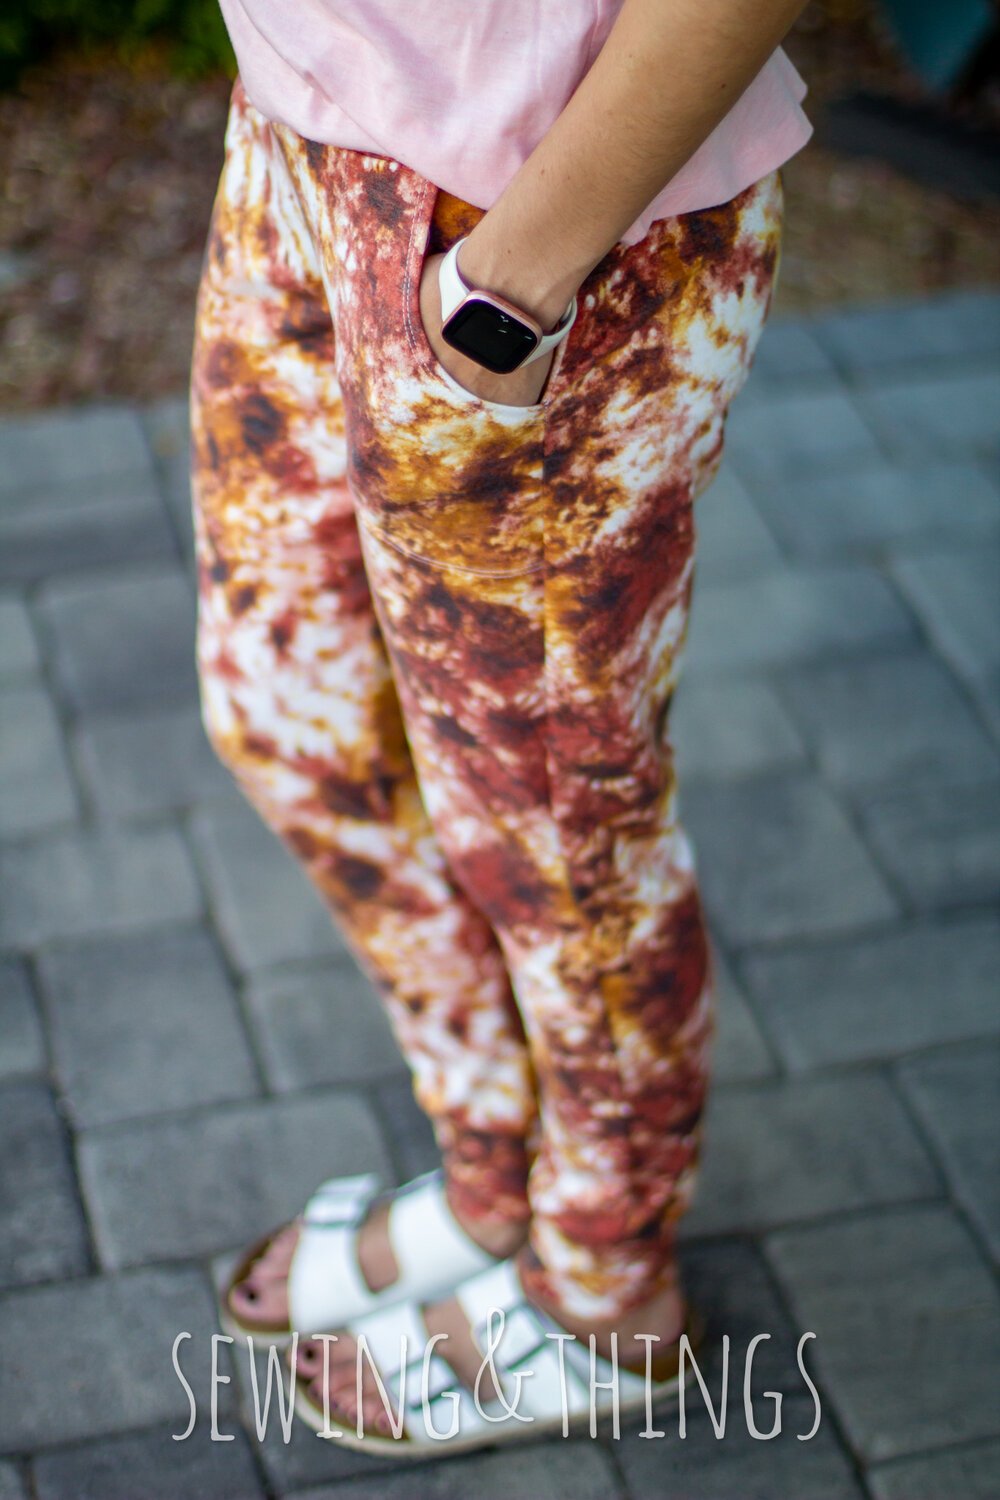
The other adjustment I make is in the pocket. The updated version has pretty deep pockets, which is great, but they are too deep for me. When I put my hands in my pockets, I like to be able to touch the bottom of the pocket, or else I feel like my hands are just floating inside (I know, I’m weird). So, I found that removing just under an inch in the pocket was perfect. I remove the length in the middle of the pocket.
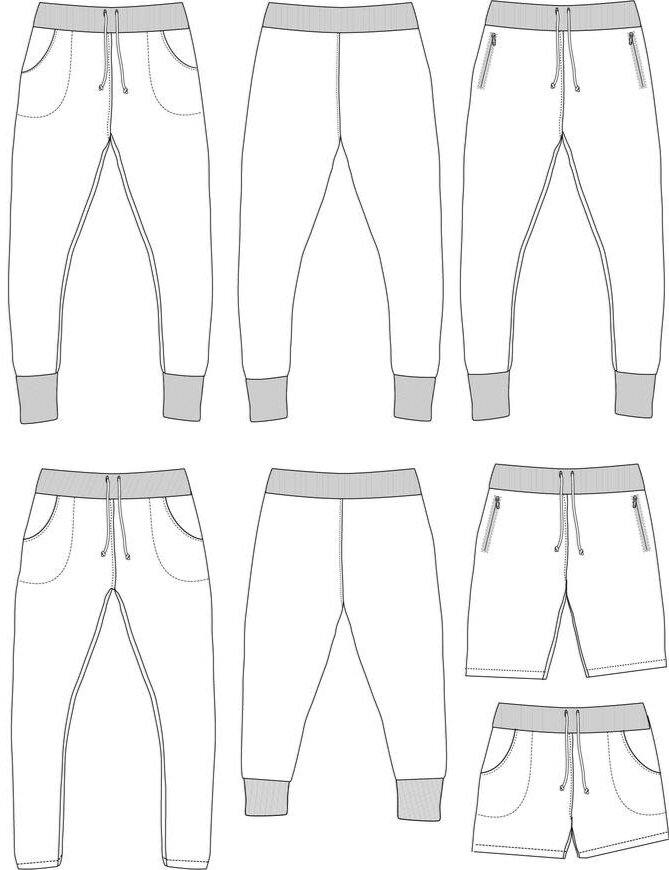
The last thing I do, which isn’t really an adjustment, is to add 2” elastic in the waistband. I love 2” elastic. If I ever add elastic to a waistband (for any pattern) I will adjust the height of the band so it will perfectly hold my 2” elastic. (Basically 4″ plus the seam allowance times 2.) This is also great if your fabric doesn’t have the best recovery and feels like you might lose your bottoms with the gigantic phone in your pocket! (At least that’s how I feel sometimes.) I also never bother with drawstrings, so I always skip that. (Though, I have been looking at the listing photos for the last little bit and maybe one of these days I’ll try adding it. The look with grommets also looks a lot better than a buttonhole and super professional.)
The only complaint I have (but really, it’s more of a love/hate) is the darn pocket! It’s kind of like a reverse patch pocket. Instead of the pocket being 2 pieces (for each side of the pocket bag) in addition to the leg pieces, it’s just one piece that makes up the pocket, and you sew around the pocket to attach it to the pants. If you aren’t doing a reverse coverstitch and you can’t find any good marking tools, it’s a real PITA since you are basically sewing blind. I don’t really love the reverse coverstitch look on the Brassies, but reverse coverstitching is a much easier way to attach the pocket because you can actually see where you are sewing. Thank goodness for matching thread!
Anyway, I still love them and these joggers are so comfy! A nice light pair that will be perfect for when the weather finally starts to cool down outside (or when the AC is blasting!)


You May Also Like
Joggerathon – Pattern Niche – Carita
September 4, 2021
Joggerathon – Closet Core Patterns – Plateau Joggers
September 23, 2021
2 Comments
Sarah
Thank you for your helpful information! I just made some Brassie joggers (shorts version) a couple of days ago! I wanted to add 2" elastic to the waist, but got tripped up on what length to make the elastic and waistband fabric (I had already cut the waistband according to the pattern and wasn’t sure how to make it work). Can you give a few more details on how you do this? I would have preferred the elastic, but gave up and completed them without it. 🙁
Trissa Marie
So I actually keep the length of the waistband at whatever the pattern has it at! So in this case, I kept it at the XS length. I attached it normally but I left about a 3-4" opening in the back so I could insert my elastic. For the elastic length, I just wrap it around my waist and cut it to however long feels good. (Just make sure you exercise/stretch it a bit before cutting so it doesn’t grow!)
You can also go back and add elastic later! The height of the brassie waistband fits the 2" elastic just fine, so all you need to do is a little bit of seam ripping so you can insert the elastic and then close it back up! I’ve had to do this with some pants I made when I was pregnant. I made the waistband a tad longer but then they were way too big without my baby bump. Thank you elastic!
If you ever want to add 2" elastic to a pattern that doesn’t have it, just make the height of your waistband at least 4" plus seam allowance (depending on the pattern). The brassies are 3/8" seam allowance, so the band height should be roughly 4.75" tall.
Hope that helps! <3